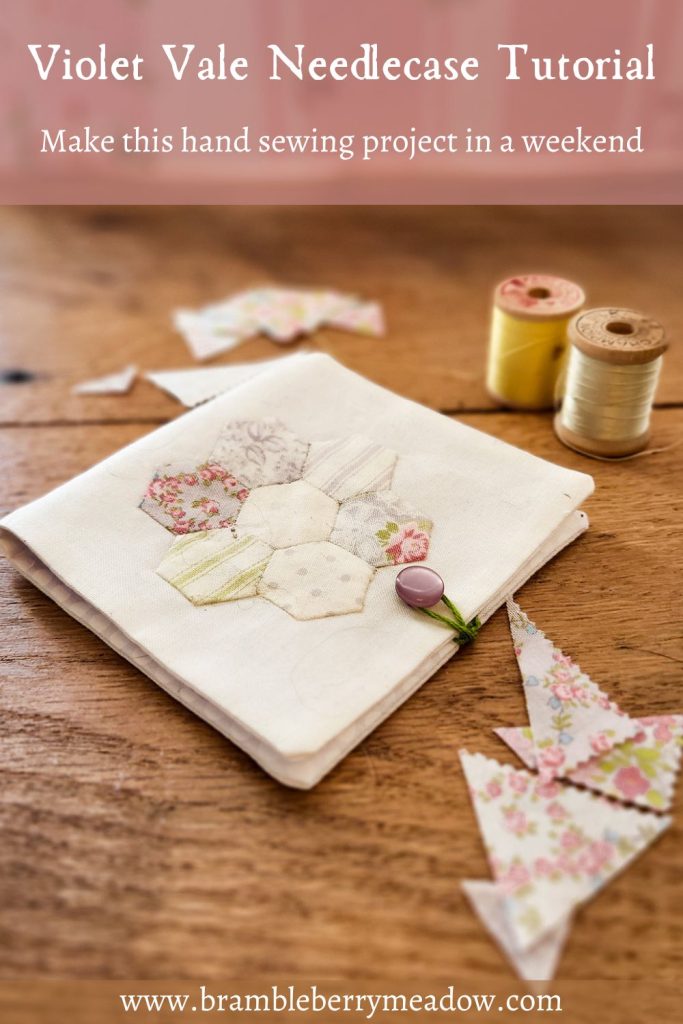
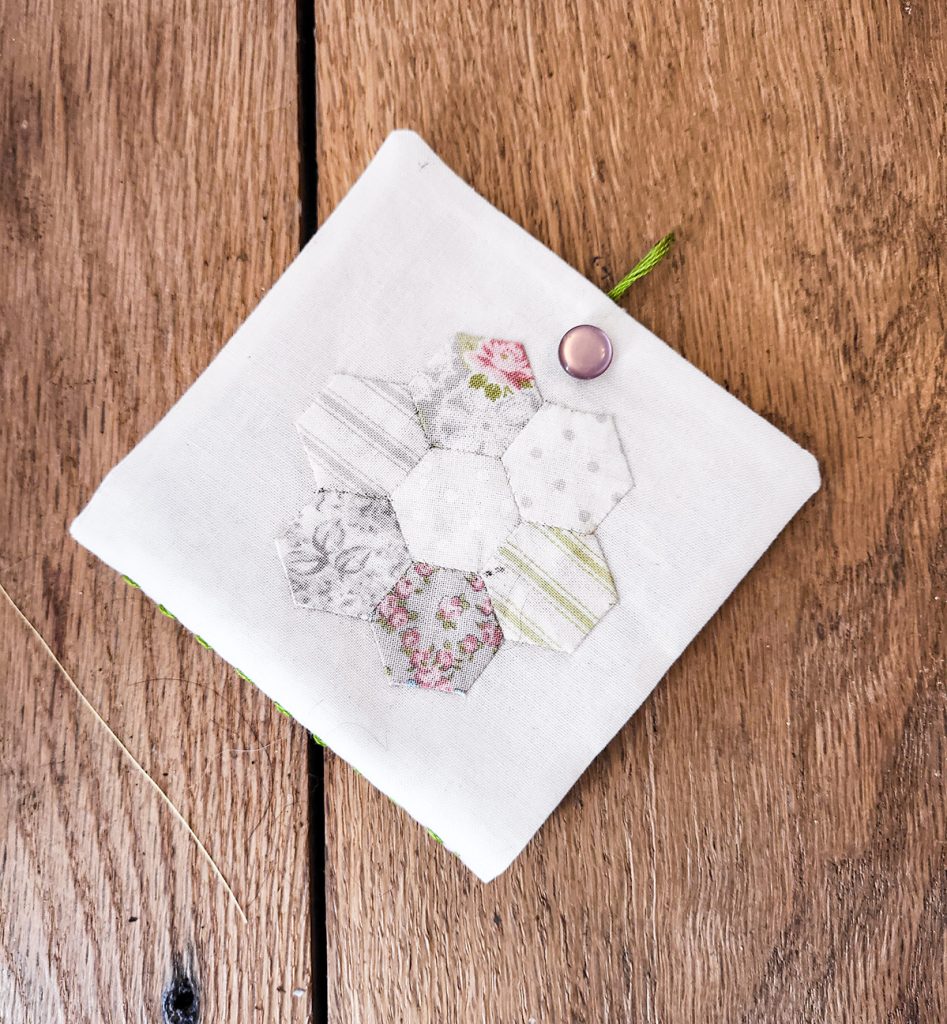
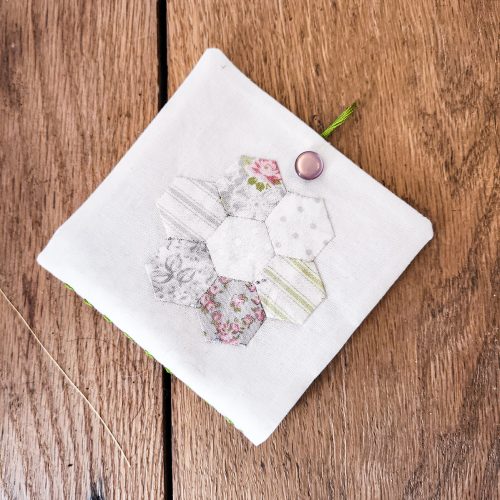
Violet Vale Needlebook Tutorial
I’ve been digging through vintage sewing manuals, and I’ve decided to start a series of basic sewing posts based on them. It might be a little intermittent, interspersed with other things, but keep a watch for them. The first thing any would-be seamstress needs is a needlebook. Not only will it help keep your needles easy to hand, but they’re also a common item for sewing swaps. This one was inspired by my continued re-reading of the Anne of Green Gables books. Anne may have hated patchwork, but I think even she would have loved this dainty needlecase, named after the Violet Vale in Avonlea.
This is a simple project. I stitched it up in a weekend, entirely by hand. Mostly because my youngest was being rather high maintenance, and it was easier than dragging out the sewing machine.
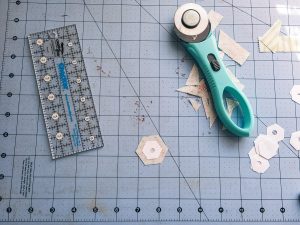
This project assumes some basic skills. Which probably means I ought to have started with those skills. But this really IS a quick and easy make. English paper piecing involves basting fabric to paper shapes in order to sew them together with great accuracy. It’s entirely a hand-sewing technique, but it can have some truly impressive results. It’s also a quiet, meditative activity for me. I’m going to send you to my favorite YouTube channel for EPP – Emma Jones Vintage Sewing Box. This video demonstrates the basic hexie flower. But don’t forget to go watch her other videos for more tips and tricks.
Now that you’ve got the idea, let’s get started:
Violet Vale Needlebook Tutorial
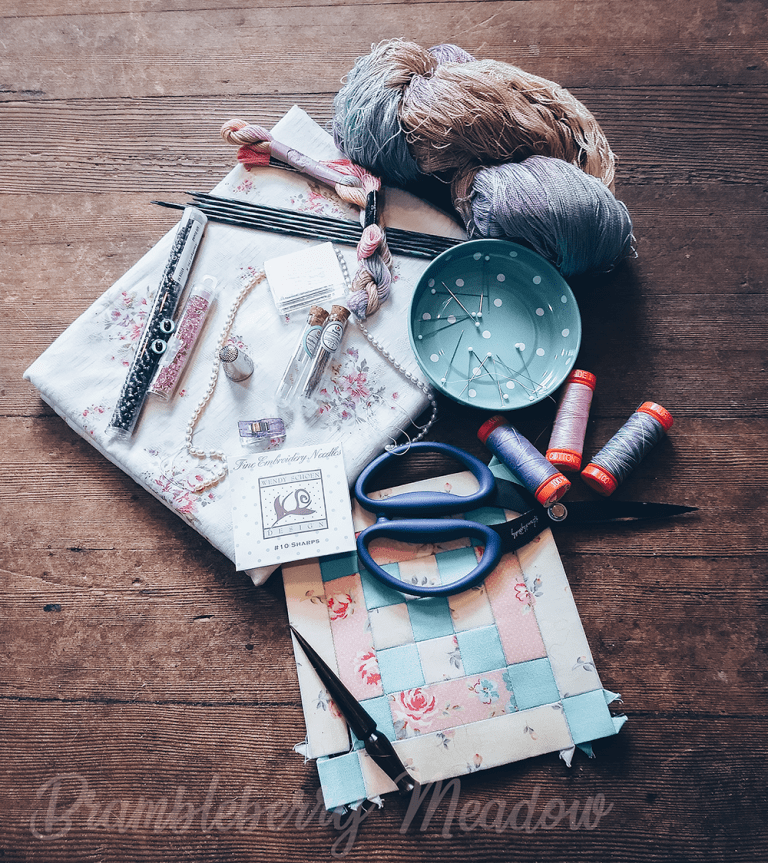
Equipment
- 1 Frixion pen or other marking device
- Hand sewing needles Multiple sizes will be needed. A 9 or 10 milliners for the EPP, a tiny sharp for the applique, a regular sharp for assemply, and a large embroidery needle for the floss or pearl cotton.
Ingredients
- 2 4.5"x8.5" piece cotton fabric May be different, if you prefer for your cover and lining
- 7 fabric scraps for hexies I used some mini charms
- 7 ½" paper hexagons for EPP
- embroidery floss or pearl cotton
- 1 button
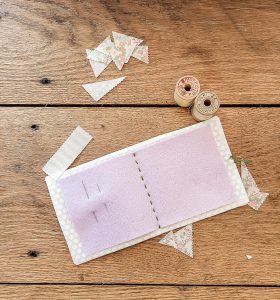
- 1 3.5"x7.5" piece wool or wool blend felt
Instructions
- Cut out 7 hexies and baste them to papers. Cut out your cover and lining fabric, and your felt,and set them aside.
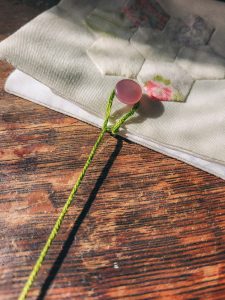
- Using a tiny whip stitch, sew your hexies into a flower. I used a size 10 milliner's needle for this step.
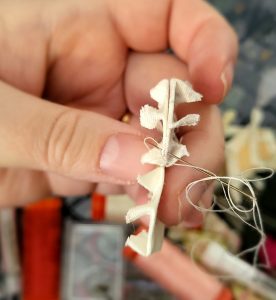
- Once you've made the flower, press it thoroughly, to crease down all the seam allowances. Remove all the papers, and press again. Now, take out your outer case fabric, and draw a line dividing it in half – front and back sides of the case. Then make a cross with your marking tool. The vertical line should be 2" from the center line. The horizontal line should be 2.25" from the bottom of fabric. This cross will allow you to center your hexie flower on the front of the case.
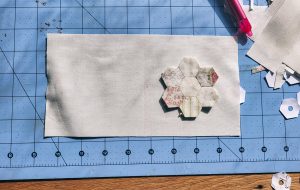
- Pin your hexie flower in place. Tiny applique pins will hold it without getting in your way as you sew.

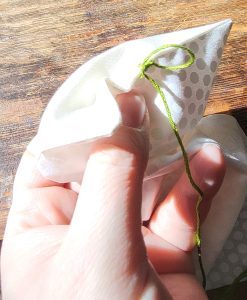
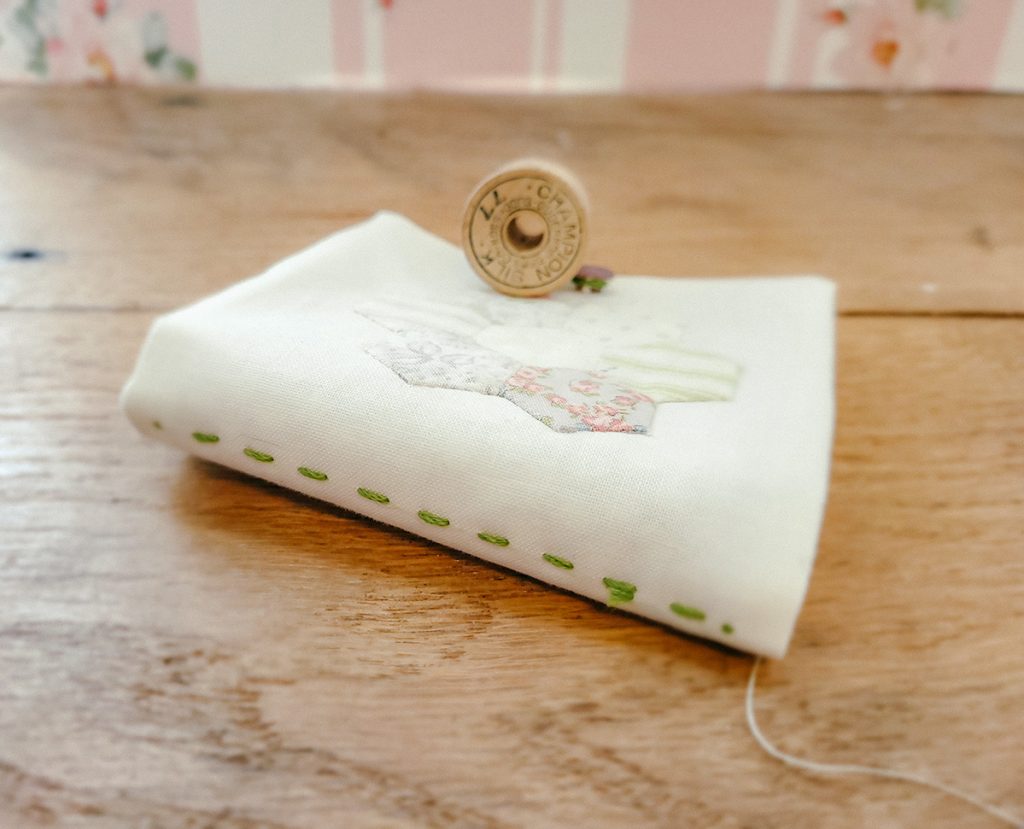
- Then applique the hexie flower to the fabric. Use a fine thread, and make your stitches as close to invisible as you can. Trim the dog ears on the seam allowances as needed, but be careful not to overdo it. You don't want holes fraying in your hexies later. Pin the finished case top to the lining fabric. Sew around, leaving a 0.25" seam allowance, and leaving a 3-4" opening along the bottom to turn. Turn the pieces, using a knitting needle or skewer to poke the corners all the way out. Press. Before you sew up the hole, we're going to do two things. First, sew on a button. Use whatever you like, but a shank button makes a better closure. Second, we're going to make a loop to close our case. Thread a needle with all 6 strands of embroidery floss or the pearl cotton. Knot the end, and work through the hole, bringing the floss out in the halfway point of the edge of the back of the case.
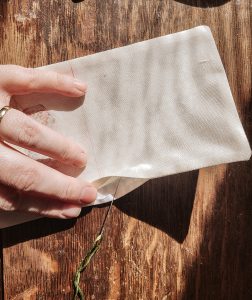
- So, take your thread inside the case, between the cover and lining fabrics.
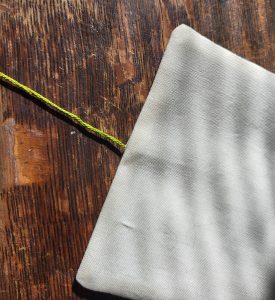
- And out at the edge of the case. Take a small back stitch, then loop the floss around the button with enough room to open and close it easily.
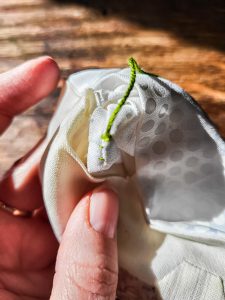
- Take another little backstitch, then make several more small buttonhole stitches to secure the loop.
- Take your floss back through the fabric, inside the case, and tie it off in the seam allowance.
- Press the piece again, then close up the opening with a ladder stitch. Redraw your center line on the cover. It should now be 4" from either edge. Place the felt on top of the case, centering it.
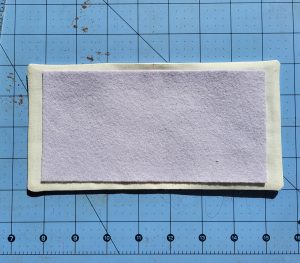
- Hiding the knots under the felt,stitch the felt to the needlecase with a large running stitch and floss or pearl cotton.
- Remove the markings, and give the piece a final press.
And there we have it. A few notes. Frixion pens are great but use caution. They have ink that “disappears” when heat is applied, as with a warm iron or clothes dryer. However, heating doesn’t actually remove the ink. So sometimes the markings will come back if the item gets cold. And other times, the ink seems to remove pigment from fabric. I had a Frixion pen once leave pink lines on red fabric after heating. So test first.
Second, you’ll be your own best friend if you get and use good needles. I may do a round-up of my favorites and sources.
I really DO recommend wool or wool-blend felt. Acrylic will just fall apart. I get my felt from Benzie Design.
Finally, my button came from my grandma’s button box. Which is why you should start a button box. It’s actually the perfect shade of violet, even though it looks pink in some of the photos. One more (and yes, I fixed the bit of floss sticking out right after I noticed it).
If you make one and share it on your socials, tag me!