Wrapping Your Hoop
Embroidery hoops are one of those subjects that elicits strong opinions among stitchers. Most forms of needlework require one (although cross stitch and a few other types CAN be done in-hand). But size, material, brand, and other variables are the subject of much debate. As is the issue of whether or not to wrap your hoop.
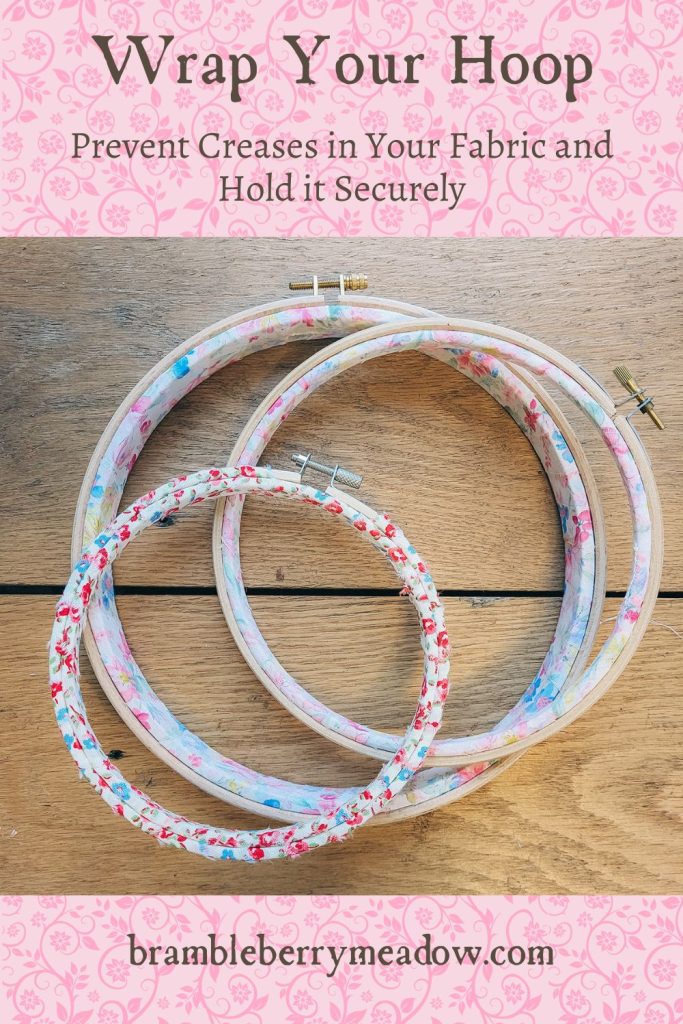
Let me come down right now fairly firmly on the side of wrapping. And, for those of you who are unfamiliar, wrapping a hoop means to wind some sort of fabric strip around it to keep it tighter, and also prevent marking the fabric with creases from the hoop.
I have some rules for happy hooping, though.
The first won’t surprise anybody, because I’ve freely admitted the fact that I’m a tool snop. And its – buy the best quality hoop you can afford. It will just save you aggravation in the long run. Good quality hoops hold better, are less likely to crack under strain, or splinter and snag your work.
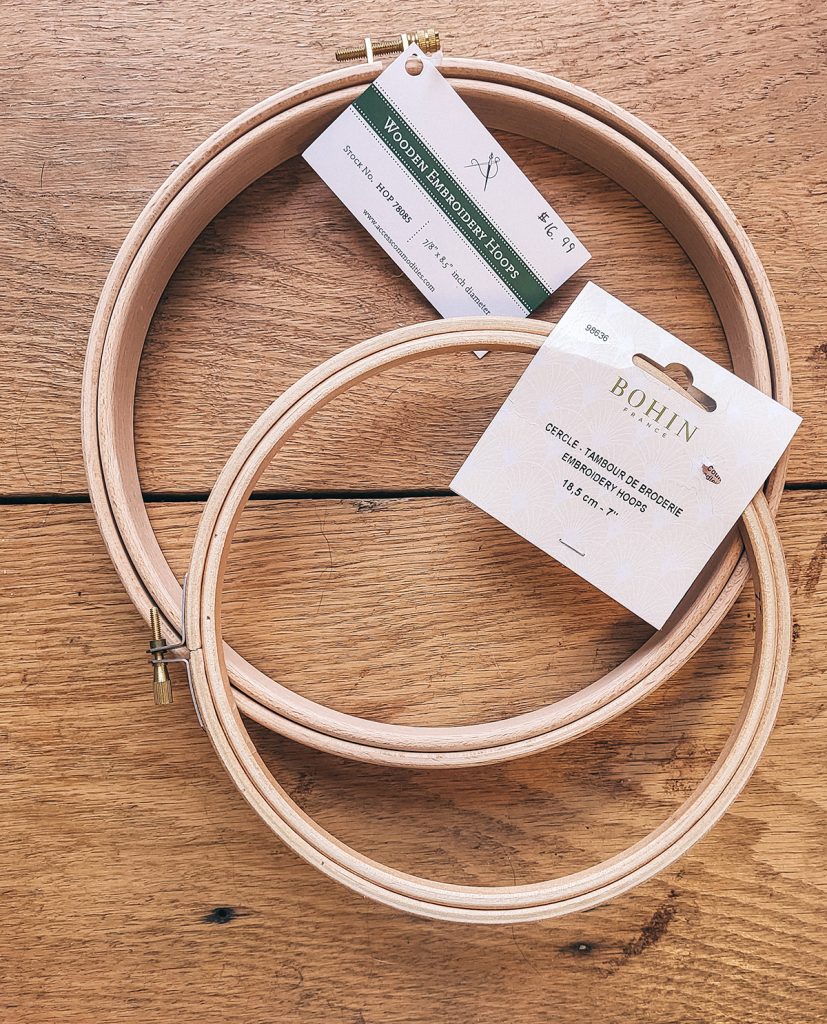
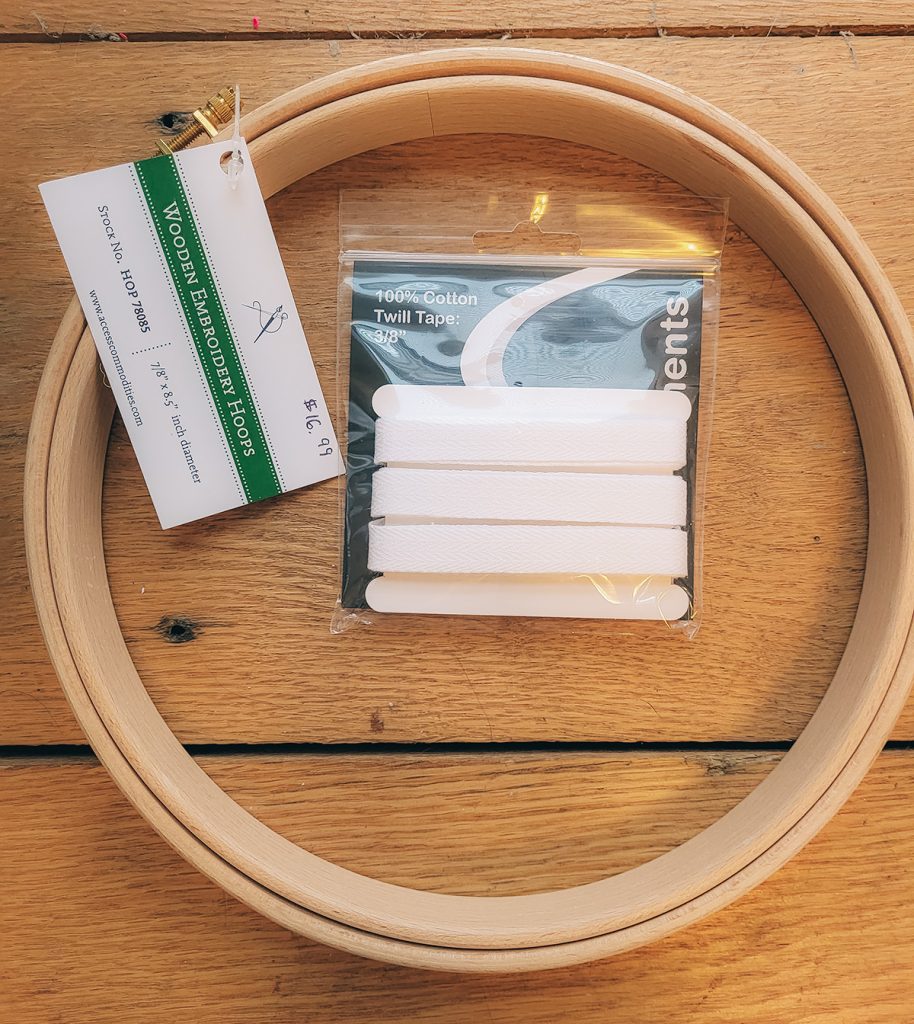
The two above are a couple favorites of mine. The larger one is a 7/8″ x 8 1/2″ Hardwicke Manor hoop by Access Commodities. The smaller is a 3/8″ x 7″ Bohin hoop. Both are made of hardwoods. I’m pretty sure both are made of beech. And both are nicely finished with rounded edges and a smooth feel. The Hardwicke Manor hoop came from Hobby House Needleworks, and the Bohin I got locally at Country Needleworks. We’ll get to the more common hoops in a minute.
The conventional wisdom is to wrap these hoops in twill tape. You can even get the fancy French tape from the same places that sell the hoops:
Now, a couple general tips on wrapping hoops:
First, you really only need to wrap one – the inner or the outer hoop. I usually wrap the inner hoop, because I find that both easier to do and better at holding my fabric securely. Second, make sure that you keep all your bulk – anywhere you sew your wrappings or start/end a new strip – out of the area where the two hoops contact each other. Translation – all stitches should be made on the inside of the inner hoop or the outside of the outer hoop. Third, keep your wraps as smooth and tight as you possibly can. Done right, the wrapping will be useful for years – you shouldn’t have to re-wrap your hoop for each project.
When you are wrapping with twill tape, you also want to be sure to butt the tape against the previous wrap. Do NOT allow the tape to overlap, or your wrapping will get so thick, you won’t be able to use the hoop – there will be no ROOM for your ground fabric. I like to use WonderClips to hold my wrappings while I work:
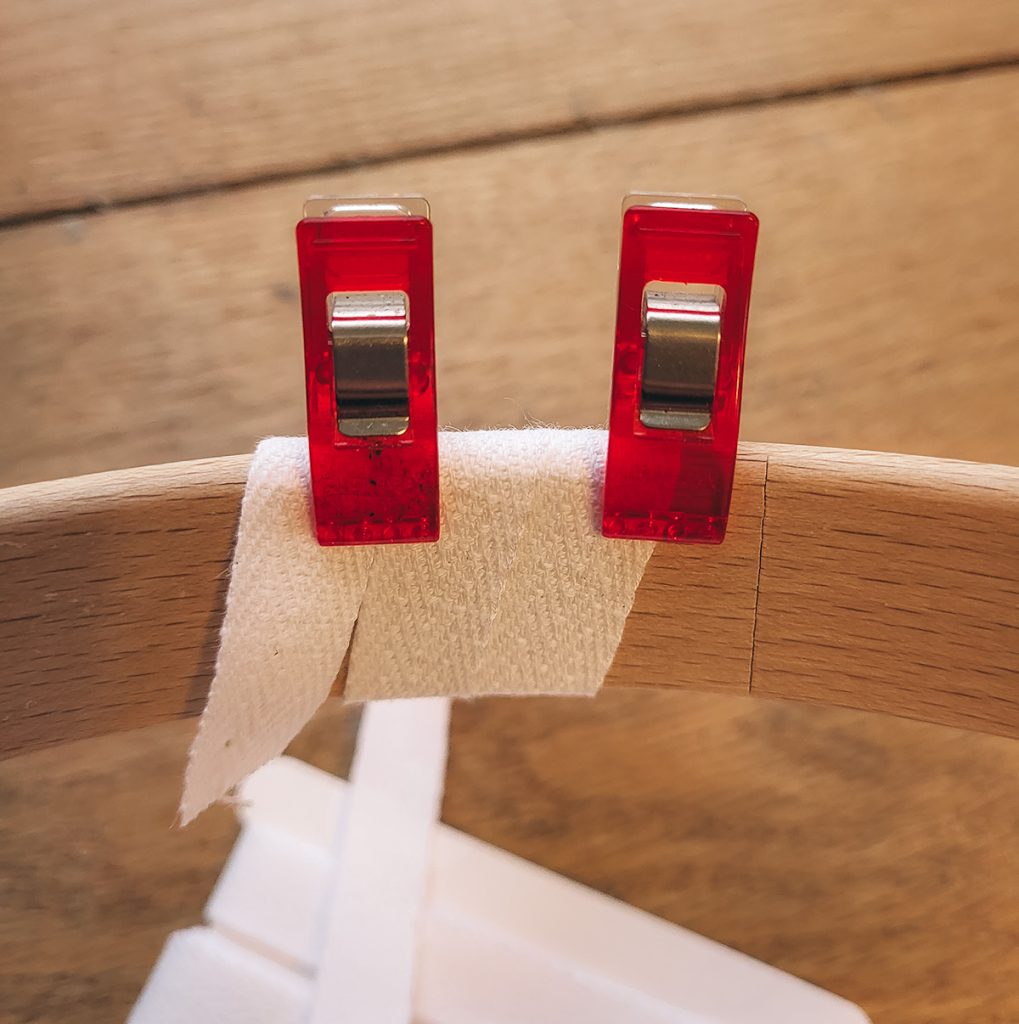
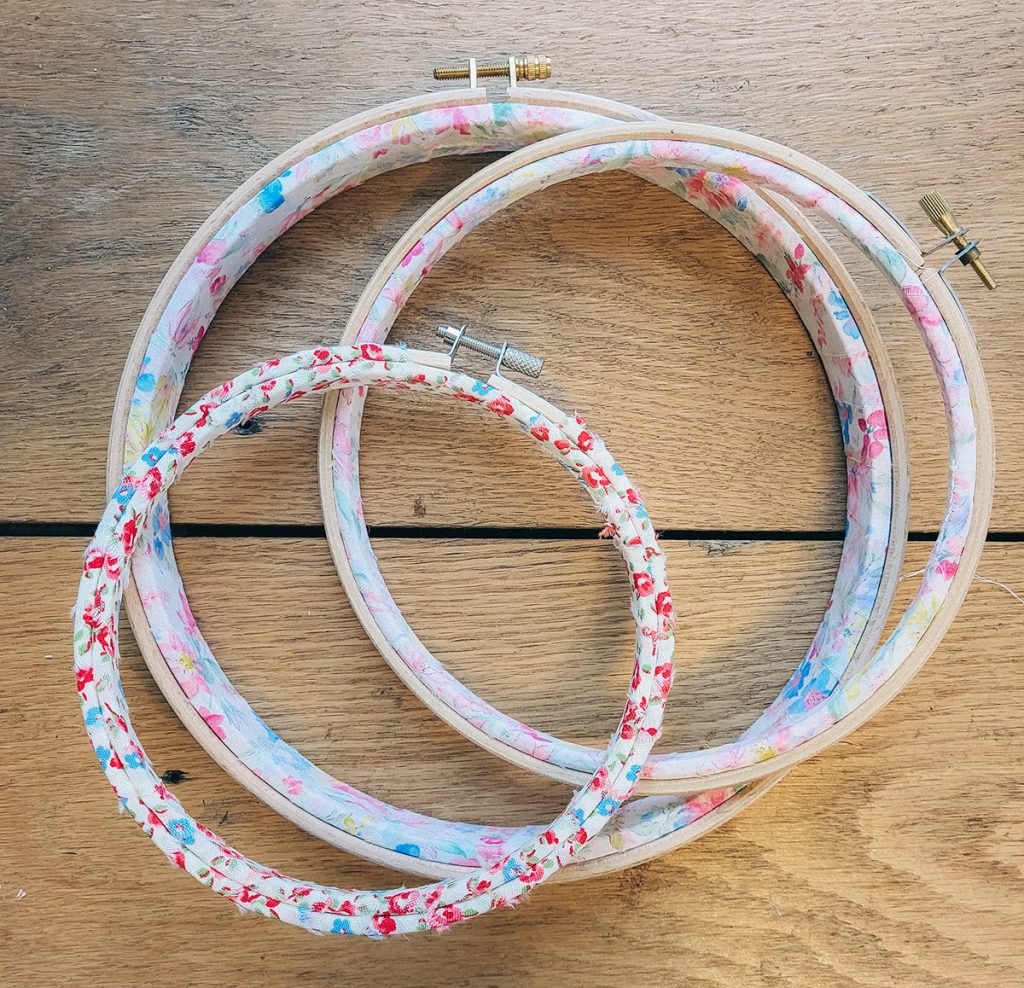
See how the tape is butted up tight, but not overlapping? That’s the goal. Now, I got this hoop wrapped, and decided that the twill tape was just a little thick. You CAN wrap hoops with other materials. Muslin is a common choice. But I prefer pretty things. And I have all sorts of quilt fabrics in my stash, as well as some printed cotton lawns.
I decided to go with the cotton lawn for both the Hardwicke Manor and Bohin hoops. So I tore some strips that were about 1″ wide. Pro tip: tearing fabric along with grain gives both perfectly straight strips AND a little bit of a vintage feel. Trim loose threads away, and press the strips flat, then begin wrapping them around the hoop. With the lawn, it’s fine enough that a little overlap is OK.
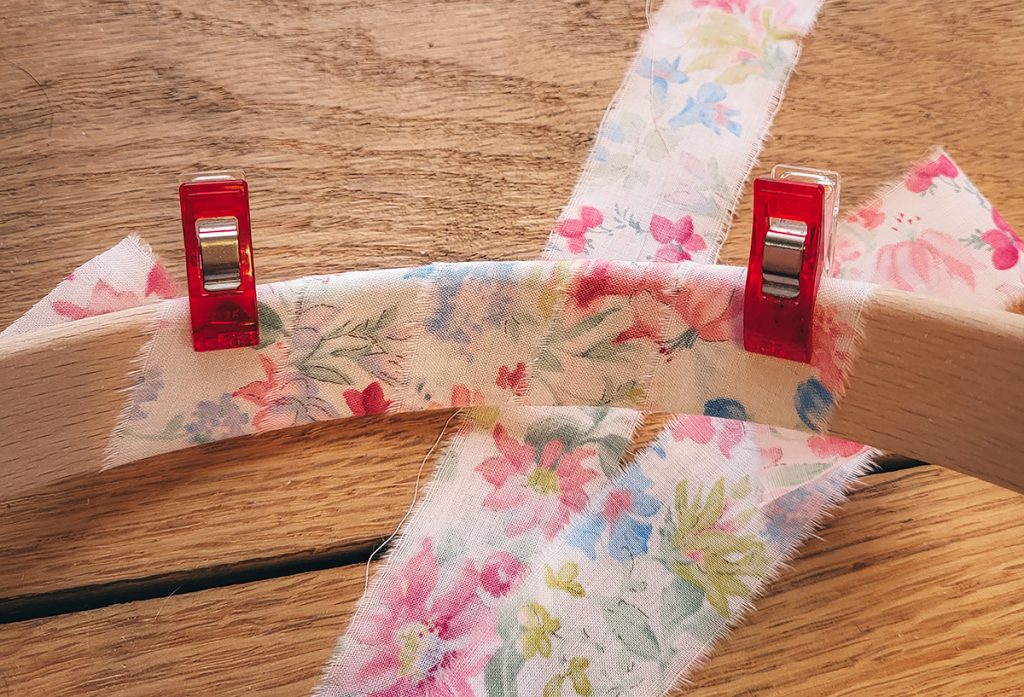
Keep wrapping. When you hit the end of the strip, secure it with a clip, and start a new one. Turn under the end of your new strip, and stitch it to the wrapped fabric already in place, before continuing to wrap. Remember to do all your stitching on the inside of the hoop! When you get all the way around, trim your strip, turn the raw edge under, and sew it down.
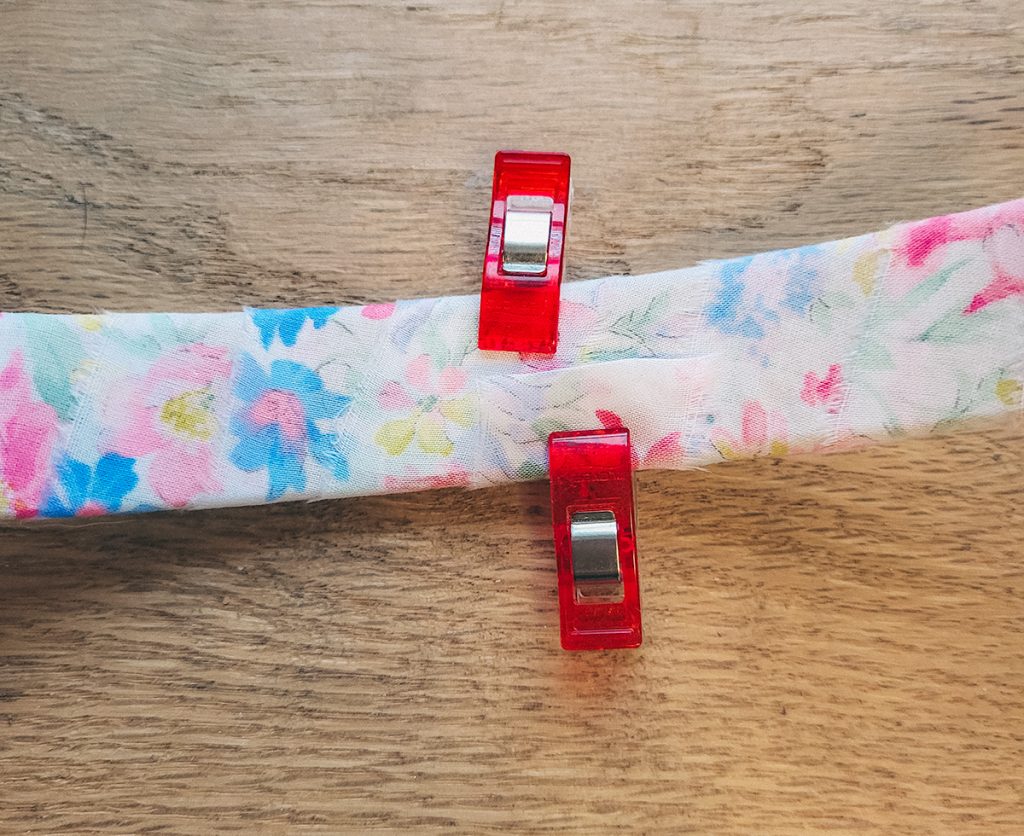
Because there will be some significant wear and tear on these, go for secure stitching, rather than invisible. Take some decent sized bites through the fabric, to give it a good hold.

Then, test and make sure your outer hoop still fits, with enough room for your ground fabric. The large hoop required two strips of lawn (1″ by the width of the fabric – which I think was 45″). The smaller Bohin hoop took a single strip.
Now, lest you think I am a complete snob, I DID grab a Big Box store hoop, just for you all. (I have used them in the past. They just tend to die in my house). This one is a Janlynn, which is a decent brand. It’s made of bamboo. And in the close-up comparison with the Bohin, you can see that the edges are NOT smoothed.

The bamboo hoop is on top, the Bohin underneath. And the bamboo just feels a little flimsy in the hand. These bamboo hoops are the only instance in which I would wrap both hoops. Just because I don’t like their texture. For these, I wrapped both with a quilting cotton, in the same manner that I did the lawn strips. But, for the outer hoop, all stitches are on the outside. And you have to secure the strips both at the beginning, and at the end, since you can’t wrap the tension screw. Since this is a smaller hoop, and I’m likely to be using it for small pieces on fine fabric, it should work OK.
I HAVE seen hoops available for purchase in certain box stores with the outer hoop wrapped in fabric. That would probably work, too. Although I prefer an wrapped inner hoop, with a quality hardwood outer hoop. It’s a texture thing. Remember, either way, to remove your fabric from your hoop between stitching sessions, which will do more to prevent hoop marks and deformed stitches than any wrapping.
And – show me your wrapped hoops! Don’t forget to tag me on Instagram @brambleberrymeadow.
Stay tuned for more on making your stitching more pleasant.